.png)
Breaking Down the Home Inspection Process Step by Step
- Oct 6, 2025
- 4 min read
Buying a home is a big decision. One of the most important steps in this journey is the home inspection. It helps you understand the condition of the property before you commit. Knowing what to expect during the inspection can make the process smoother and less stressful. This guide breaks down the home inspection process step by step, so you feel confident and prepared.
Understanding the Home Inspection Process
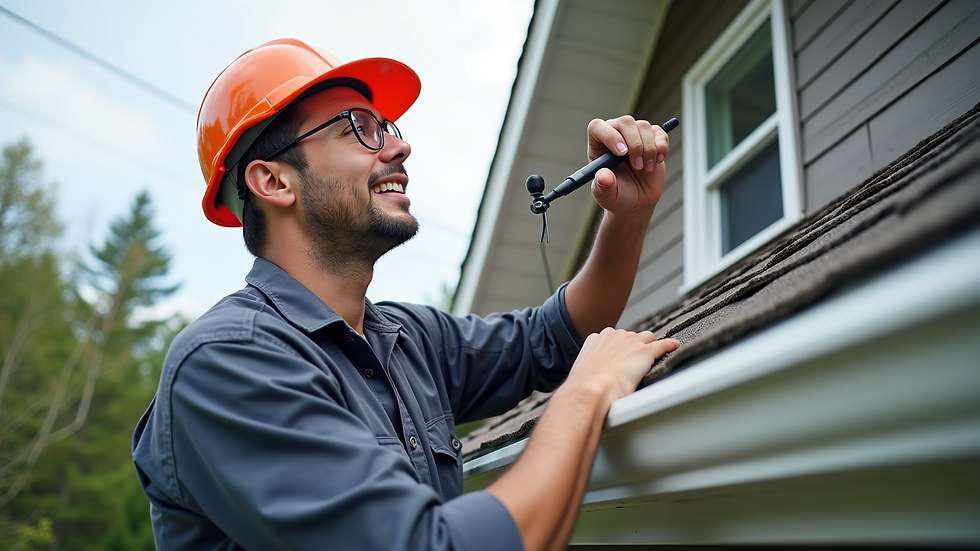
The home inspection process is a thorough examination of a property’s condition. It covers everything from the roof to the foundation. The goal is to identify any issues that might affect the safety, value, or livability of the home. A professional inspector will check major systems like plumbing, electrical, heating, and cooling. They also look at structural elements such as walls, floors, and ceilings.
During the inspection, the inspector will take notes and photos to document their findings. Afterward, you will receive a detailed report. This report helps you make informed decisions about your purchase. It can also be a tool for negotiating repairs or price adjustments with the seller.
If you want to learn more about the home inspection process, Property Pro Checks offers expert services tailored to Houston, TX homes.
Step 1: Scheduling the Inspection
Once you have an accepted offer on a home, the next step is to schedule the inspection. It’s best to do this quickly, as most contracts have a limited inspection period. Choose a licensed and experienced inspector. You can ask for recommendations or check online reviews.
When scheduling, try to be present during the inspection. Being there allows you to ask questions and see issues firsthand. It also helps you understand the inspector’s report better.
Step 2: Preparing for the Inspection
Before the inspector arrives, make sure the home is accessible. Clear any clutter that might block access to important areas like the attic, basement, or electrical panel. Ensure utilities such as water and electricity are turned on. This allows the inspector to test systems properly.
If the home has pets, secure them to avoid distractions or safety concerns. Also, gather any documents related to previous repairs or renovations. These can provide useful background information.
Step 3: What Happens During the Inspection?
The inspection usually takes 2 to 4 hours, depending on the size and condition of the home. The inspector will examine:
Roof and gutters: Checking for damage, leaks, and proper drainage.
Exterior walls and foundation: Looking for cracks, water damage, or structural issues.
Plumbing system: Testing faucets, pipes, water heater, and drainage.
Electrical system: Inspecting wiring, outlets, circuit breakers, and safety features.
Heating and cooling systems: Assessing the furnace, air conditioner, and ventilation.
Interior rooms: Checking walls, ceilings, floors, windows, and doors.
Attic and basement: Looking for insulation, moisture, pests, and structural concerns.
The inspector uses tools like moisture meters, electrical testers, and ladders to get a complete picture. They will note any defects or areas that need maintenance.

What Can Make You Fail a Home Inspection?
While a home inspection is not a pass/fail test, some issues can be deal-breakers or require urgent attention. Here are common problems that might cause concern:
Structural damage: Large cracks in the foundation or walls, sagging roofs, or unstable floors.
Water damage and mold: Signs of leaks, flooding, or mold growth can indicate serious problems.
Electrical hazards: Outdated wiring, overloaded circuits, or missing safety devices like GFCI outlets.
Plumbing leaks or failures: Broken pipes, poor water pressure, or faulty water heaters.
Pest infestations: Termites, rodents, or other pests that can damage the home.
HVAC system issues: Non-functioning heating or cooling units, or poor ventilation.
If these problems are found, you can negotiate repairs with the seller or decide if the home is worth the risk. Remember, no home is perfect, but knowing the issues upfront helps you avoid surprises later.
Step 4: Reviewing the Inspection Report
After the inspection, you will receive a written report. This document is your roadmap to understanding the home’s condition. It will include:
A summary of major findings
Photos of problem areas
Recommendations for repairs or further evaluation
Notes on maintenance tips
Take your time to read the report carefully. If anything is unclear, don’t hesitate to ask the inspector for clarification. You can also share the report with your real estate agent or a contractor for advice.
Use the report to decide your next steps. You might request the seller to fix certain issues or adjust the price. Alternatively, you may choose to walk away if the problems are too severe.

Step 5: After the Inspection
Once the inspection is complete and you have reviewed the report, it’s time to act. Here are some practical tips:
Negotiate repairs: Use the report to ask the seller for repairs or credits.
Schedule specialized inspections: If the inspector recommends, get experts to check things like pests, radon, or sewer lines.
Plan for maintenance: Even if the home is in good shape, regular upkeep is essential.
Keep records: Save the inspection report and any repair receipts for future reference.
Remember, a thorough inspection helps protect your investment. It gives you peace of mind and a clearer picture of what owning the home will involve.
Taking the time to understand the home inspection process can save you money and stress. By following these steps, you ensure that you know exactly what you’re buying. For those in Houston, TX, partnering with trusted professionals like Property Pro Checks can make all the difference. Their expertise and clear communication help you make smart, confident decisions about your home.
If you want to learn more about the home inspection process, visit Property Pro Checks for detailed information and expert services tailored to your needs.


Comments